How to Afford Invisalign: Does My FSA Cover Invisalign?
Craig is one of many adult orthodontic patients whose family was not able to afford the treatment when they were growing up. Furthermore, any hope of having them covered by insurance was dashed when Craig’s dentist declared that he “didn’t need” braces. But, as a high-school senior feeling self-conscious about the appearance of his teeth (like one does), Craig wished for a straighter smile.
Craig went on to college, graduated, and got a job. His job was a good one with benefits and…an FSA! He looked around and saw that some of his coworkers were getting Invisalign. There was in fact a whole crew of folks just like him, who had wanted to perfect their smiles but weren’t able to as teens for one reason or another. Craig learned from his coworkers that Invisalign is FSA eligible, and that made up his mind. He was going to go for it!
A Comprehensive Guide to Using Your FSA for Invisalign
An FSA can be a smart way to make orthodontic treatment more affordable. Here’s a step-by-step guide outlining how you can use your FSA to cover Invisalign costs.
- Understanding FSAs: A flexible spending account is a special account provided by some employers that allows you to set aside pre-tax dollars for specific healthcare-related expenses. The money you contribute to an FSA is tax-free, which can result in significant savings.
- Check your FSA eligibility: Before you proceed with Invisalign treatment, consult with your employer to confirm if your FSA covers Invisalign. Most FSAs do, as it is a recognized orthodontic treatment.
- Determine the contribution limit: Each year, the IRS sets a limit on how much you can contribute to your FSA. In 2024, the limit is $3200.
- Estimate your Invisalign costs: To utilize your FSA optimally, consult with your orthodontist to get an estimate of how much your Invisalign treatment will cost. This will help you plan your FSA contributions more effectively. Since many Invisalign treatments take longer than a year and most orthodontists (Dot Smiles included) accept monthly payments, you may be able to use two years’ FSA contributions towards your Invisalign.
- Budget your contributions: Once you know the treatment cost and contribution limit, budget and plan your FSA contributions accordingly. Make sure you inform your employer about your preferences during the annual enrollment period.
- Submit your receipts for reimbursement: Pay the orthodontist according to your payment plan, and then submit the receipts to your FSA administrator for reimbursement. (Some FSA plans provide a debit card you can use to pay directly. So convenient!)
- Use your funds within the year: Remember that FSA funds typically must be used within the calendar year. Some employers offer a grace period or a carryover limit of up to $550. Make sure to use your funds before the deadline!
By using your FSA, you can make your Invisalign treatment more affordable and accessible, like Craig, and take the critical first step in achieving a more confident and beautiful smile.

Utilize Your FSA for Invisalign and Transform Your Smile Today
Like Craig, you may be able to leverage your employer’s FSA to transform your smile, enhance your self-esteem, and better your oral health without breaking the bank. Don’t let finance-related reservations hold you back; make the savvy move to use pre-tax dollars and start your journey towards a happier smile. Ready to take the next step? Reach out to us at Dot Smiles and let us guide you through the process, mapping out a personalized strategy for a smile that aligns with your goals.
“DR. JOFFRE AND HIS TEAM WERE INCREDIBLY HELPFUL. THE RESULTS ARE PRETTY QUICK… MY JAGGED TOOTH, THAT WAS GONE IN LIKE A MONTH. SO I WOULD DEFINITELY RECOMMEND IT AND DO IT AGAIN.”
I’m Ready TO BEGIN MY SMILE TRANSFORMATION!
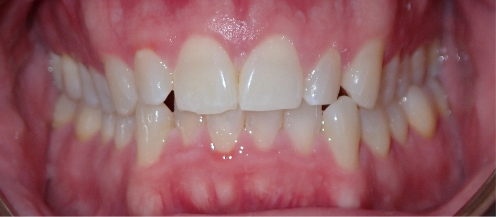
Craig